
Keyboard Placement After Shoulder Immobilization: A Recovery-First Guide
A shoulder sling turns an ordinary keyboard into a tiny office obstacle course. One minute you are answering email. The next, your neck is tense, your wrist is floating, your injured shoulder is quietly protesting, and your mouse is somehow in another zip code.
Keyboard placement after shoulder immobilization is not about creating a perfect ergonomic showroom. It is about reducing reach, protecting your healing shoulder, keeping the arm supported, and getting necessary typing done without turning recovery into a desk-shaped tug-of-war.
Good news: the safest setup is usually practical, inexpensive, and adjustable in minutes.
- ✓ Start close.
- ✓ Support first.
- ✓ Type less than your pride wants.
This guide uses recovery-first ergonomics, common post-op restrictions, and practical workstation logic to help you build a gentler typing setup. Your surgeon, physical therapist, or occupational therapist always gets the final vote.
Fast Answer: The Safer Keyboard Zone
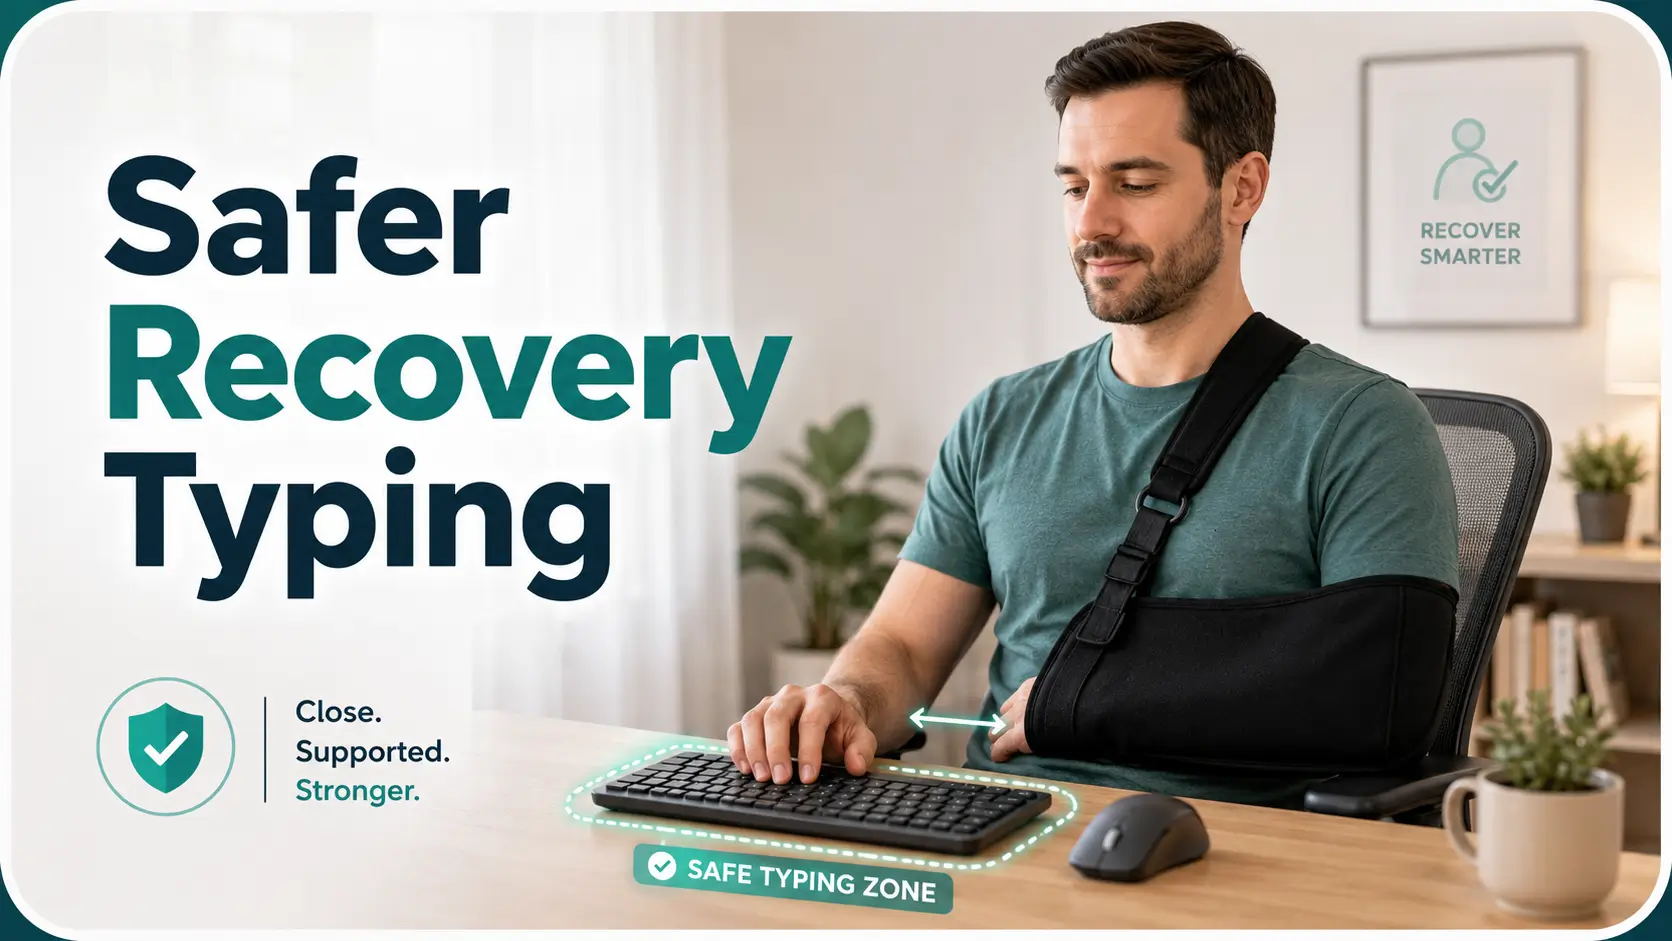
After shoulder immobilization, the safest keyboard placement usually keeps your elbows close to your body, wrists neutral, shoulders relaxed, and the injured arm supported rather than reaching forward. Use a compact keyboard if helpful, bring the keyboard closer to your lap or midline, raise the chair if needed, and avoid twisting, shrugging, or typing through pain.
- Closest first: the keyboard should come to you, not the other way around.
- Mouse matters: keep the mouse inside the same comfort zone as the keyboard.
- Medical rules win: sling instructions, motion limits, and weight-bearing restrictions come before desk comfort.
Table of Contents
Safety First: Read This Before Adjusting Your Desk
This article supports general ergonomic education only. It is not medical advice, diagnosis, rehabilitation instruction, or a substitute for your surgeon, orthopedic clinician, occupational therapist, or physical therapist.
After shoulder immobilization, your typing setup should respect your specific injury, surgery type, sling instructions, range-of-motion limits, lifting limits, wound care instructions, and weight-bearing restrictions. Two people can both be “in a sling” and have completely different rules. A rotator cuff repair, shoulder replacement, fracture, dislocation, and labral repair are not the same recovery story wearing the same costume.
Major orthopedic organizations commonly describe the sling as a protective support after shoulder procedures, and some patients may need it for several weeks depending on the surgery and clinician preference. That means your desk setup should protect the plan you were given, not improvise around it.
- Do not remove or loosen a sling just to type unless your clinician allows it.
- Do not rest body weight through the injured arm unless you were cleared to do so.
- Do not treat worsening pain, tingling, swelling, or weakness as an ergonomic puzzle.
Apply in 60 seconds: Write down your current sling rule, motion limit, and lifting limit before adjusting your keyboard.
Who This Helps, And Who Should Pause First
Best For Desk Workers Trying To Type In A Sling
This guide is for people trying to return to light computer tasks while one shoulder is immobilized. That may mean email, remote work, school assignments, medical billing portals, calendar scheduling, forms, or the grim little parade of password resets that appears exactly when one hand is unavailable.
The focus is not athletic rehab. It is daily desk survival: keyboard distance, mouse placement, chair height, laptop posture, arm support, and typing duration.
If your workday involves long documents, spreadsheets, coding, customer support, charting, claims, or online teaching, the setup matters. A few inches of reach can become hundreds of small shoulder demands by lunchtime. The shoulder notices. It keeps receipts.
Not For Painful “Push Through It” Recovery
This guide is not for pushing through sharp pain. It is not for overriding post-op restrictions. It is not for testing whether your shoulder is “probably fine now” because your inbox looks aggressive.
Pause and contact your clinician before making workstation changes if you have new numbness, tingling, worsening swelling, new weakness, fever, wound drainage, spreading redness, major color change in the hand, or pain that feels sudden, severe, or different from your usual recovery soreness.
For broader preparation before a visit, an orthopedic appointment checklist can help you organize restrictions, symptoms, medication questions, and work concerns before you speak with your care team.
The Quiet Goal: Type Less, Strain Less, Heal Better
The keyboard is not a battlefield. It is a tool.
The quiet goal is to reduce unnecessary shoulder demand while still handling the work that cannot wait. That often means fewer keystrokes, shorter sessions, better support, a closer keyboard, and a mouse that does not require a tiny expedition.
Recovery typing is not about looking normal. It is about keeping the shoulder calm while your life continues in small, careful increments.
Money Block: Quick “Should I Type Right Now?” Checklist
Use this yes/no check before a typing session.
- Yes/No: Did your surgeon or therapist allow light desk tasks?
- Yes/No: Can you keep the sling or immobilizer positioned as instructed?
- Yes/No: Can the keyboard and mouse be used without reaching forward?
- Yes/No: Can your forearm be supported without pressing through the shoulder?
- Yes/No: Can you stop after 5–10 minutes if symptoms increase?
Neutral action line: If any answer is “no,” reduce the task, use dictation, or ask your clinician what is allowed before continuing.
The First Placement Rule: Bring The Keyboard To You
Reach Is The Enemy After Immobilization
The first rule is simple: bring the keyboard to you.
After shoulder immobilization, reaching forward can pull the upper arm away from a protected position. Even a small reach may encourage shoulder shrugging, trunk leaning, neck tension, or forearm fatigue. The movement may look harmless from across the room, but your healing tissues may experience it as an unwanted tug.
Place the keyboard close enough that your upper arms can stay near your sides. Your elbows should not drift forward like they are trying to escape the meeting. Your wrists should not need to bend sharply. Your shoulders should feel low, heavy, and quiet.
Keep The Keyboard Close Enough That Your Upper Arms Stay Calm
A useful test: sit in your chair with the sling positioned as instructed. Let your shoulders relax. Now bring the keyboard toward the front edge of the desk or onto a stable tray or lap desk if that is safe and allowed.
The keyboard is probably close enough when you can type without pulling the injured shoulder forward, lifting the shoulder toward the ear, or twisting your torso. If your neck tightens within two minutes, the desk is whispering useful information.
For people with broader desk pain patterns, the same “bring tools closer” principle also appears in orthopedic pain management for remote workers, where repeated small reaches can turn into a surprisingly expensive discomfort habit.
Here’s What No One Tells You…
Desk height matters, but keyboard distance often matters more.
A beautifully expensive desk can still be wrong if the keyboard is too far away. A humble folding table can be workable if the keyboard, mouse, chair, and arm support create a protected zone. Recovery does not care whether your office setup has a walnut finish. It cares whether your shoulder has to chase the keys.
Elbows stay near the body. No forward chase.
Pointer lives beside the keyboard, not beyond the horizon.
Forearm rests as allowed. Shoulder stays relaxed.
Stop if pain, tingling, swelling, or pulling increases.
Compact Keyboard, Smaller Motions: Why Full-Size Layouts Can Betray You
The Number Pad Problem
A full-size keyboard is not evil. It is simply wide. During shoulder recovery, wide can become expensive.
The number pad pushes the mouse farther away on the right side. If your injured side is the mouse side, that extra reach can become the main source of irritation. If your uninjured side is doing all the work, the full-size layout can still push you into twisting, leaning, and reaching across your midline.
This is why many computer workstation ergonomics resources recommend enough space for both the keyboard and pointing device, and why keyboards without a numeric keypad are often considered when space or reach is a problem.
Tenkeyless Or Compact May Be Easier During Recovery
A tenkeyless keyboard removes the number pad. A compact keyboard is even smaller. Either option can let the mouse sit closer to the center, which reduces repeated shoulder travel.
If you need numbers occasionally, a separate number pad can be placed only when needed. Think of it as a visiting specialist, not a permanent roommate.
You can also use a keyboard with a built-in touchpad, a trackball, or voice input. The best option depends on your job tasks, hand comfort, and medical restrictions.
Don’t Let “Normal Desk Setup” Win By Default
The old desk setup may have worked before immobilization. That does not make it appropriate now.
Temporary changes are not failure. They are recovery engineering. You can return to a more familiar layout later if your clinician clears you and your symptoms allow it.
Money Block: Full-Size Keyboard vs Compact Keyboard
| Option | Best When | Trade-Off |
|---|---|---|
| Full-size keyboard | You use numbers constantly and can keep the mouse close. | May push the mouse too far away. |
| Tenkeyless keyboard | You want familiar keys with less mouse reach. | No built-in number pad. |
| Compact keyboard | You need the smallest comfort zone possible. | Some keys may require function shortcuts. |
| Separate number pad | You need numbers sometimes, not all day. | One more device to position carefully. |
Neutral action line: Choose the layout that reduces reach first, then solve number-entry convenience second.
Keyboard Height After Shoulder Immobilization: The Goldilocks Zone
Too High Creates Shoulder Shrugging
A keyboard that is too high can make both shoulders creep upward. This is especially annoying in a sling, because the injured side already feels crowded. Add a high keyboard, and suddenly your neck is doing unpaid overtime.
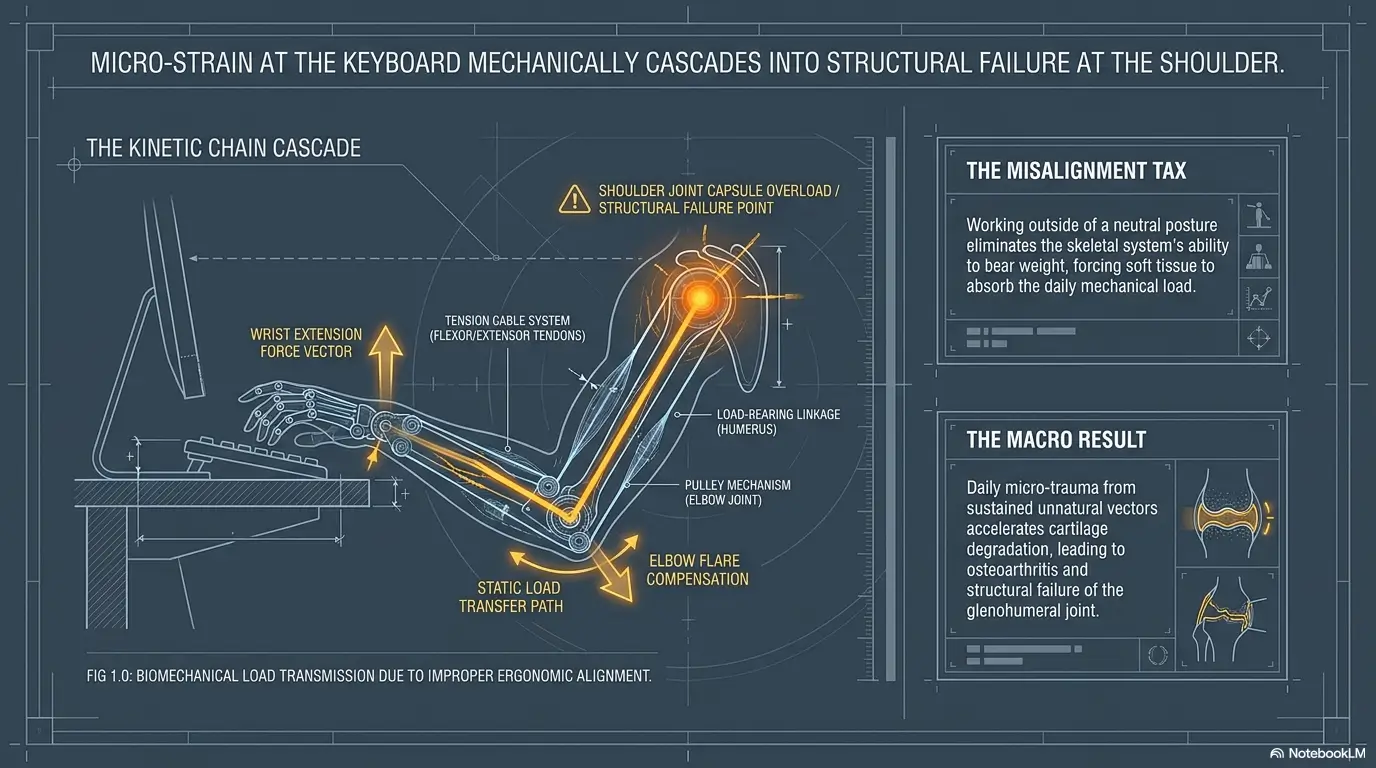
The goal is not a textbook elbow angle at all costs. The goal is a position that lets your shoulders stay relaxed while your wrists remain close to neutral. OSHA’s computer workstation guidance emphasizes keyboard positioning that supports straight, neutral wrist postures while accounting for arm angle.
Too Low Can Pull The Arm Forward
A keyboard that is too low can also cause trouble. If you slide forward, round your upper back, or let the injured arm drift downward, you may create pulling through the shoulder, elbow, wrist, or neck.
This is common with low coffee tables, couch setups, and laptops balanced on soft cushions. The whole body folds around the screen. The sling follows. The shoulder writes a complaint letter in muscle tension.
Aim For Supported Forearms And Neutral Wrists
The ideal feel is calm rather than dramatic. Your shoulders relax. Your elbows or forearms have support as allowed. Your wrists are not sharply bent. Your injured arm does not hover. Your torso faces the screen without twisting.
If you already struggle with wrist discomfort from computer work, a related guide on wrist splints for typing pain can help you think through wrist position without confusing wrist support with shoulder protection.
Show me the nerdy details
Keyboard height is really a chain problem. If the keyboard is high, the shoulder may elevate, the elbow may flare, and the wrist may extend. If the keyboard is low and far away, the trunk may flex, the scapula may protract, and the forearm may lose support. After shoulder immobilization, the usual “elbow around 90 degrees” shortcut is less important than the combined result: protected shoulder position, neutral wrist, relaxed neck, and no repeated forward reach.
- Raise the chair if the keyboard is too high, but keep feet supported.
- Use a stable tray or lap desk only if it does not violate restrictions.
- Stop adjusting if symptoms increase instead of improve.
Apply in 60 seconds: Type one sentence and notice whether your shoulder rises toward your ear.
Mouse Placement May Matter More Than The Keyboard
The Hidden Reach That Irritates Recovery
Many people fix the keyboard and forget the mouse. This is the desk equivalent of locking the front door while leaving a raccoon in the pantry.
The mouse often causes more repeated shoulder motion than the keyboard. It sits too far to the side, behind a coffee mug, beyond the number pad, or at the far edge of the desk. Every click requires a small reach. Small reaches become hundreds of repetitions.
If mouse use is already a pain trigger, you may want to compare options in ergonomic mouse choices for shoulder pain, especially if your injured side is also your dominant mouse side.
Move The Mouse Inside The Comfort Zone
Place the mouse close to the keyboard. If you use a compact keyboard, the mouse can often come closer to your midline. If the injured arm is on the mouse side, ask your clinician whether switching hands is acceptable. Do not assume.
Other options include a trackball, touchpad, vertical mouse, keyboard shortcuts, browser bookmarks, or voice commands. The goal is not gadget collecting. The goal is reducing repeated shoulder travel.
The 30-Second Test
Try this simple check: use the keyboard and mouse for 30 seconds.
During that time, ask four questions:
- Did my injured shoulder move forward?
- Did either shoulder shrug?
- Did I lean, twist, or reach?
- Did symptoms increase during or after the test?
If the answer is yes, adjust the mouse before blaming the keyboard. The little pointer may be the actual villain wearing a plastic cape.
Money Block: Mouse Decision Card
Use a standard mouse when it can sit close, your wrist stays neutral, and your shoulder remains relaxed.
Try a trackball or touchpad when repeated reaching or sweeping motions increase shoulder strain.
Try keyboard shortcuts when the task is repetitive, such as saving, switching tabs, opening search, or formatting text.
Try voice input when typing volume is the problem, not just pointer placement.
Neutral action line: Test one change for five minutes, then keep a symptom note instead of buying three devices at midnight.
Common Mistakes That Make Typing Hurt More Than It Should
Mistake 1: Reaching Across The Desk “Just For A Minute”
“Just for a minute” is how desk strain sneaks in wearing socks.
One forward reach may not seem important. But over a morning of messages, forms, tabs, and copy-paste errands, the injured shoulder may be pulled forward again and again. Soreness may not arrive immediately. It may appear later, when you are trying to sleep or get dressed.
Keep the keyboard and mouse close from the start. Do not wait until discomfort becomes loud.
Mistake 2: Letting The Sling Hang Unsupported
A sling should support and protect the arm according to your clinician’s instructions. If the immobilized arm hangs awkwardly, dangles, or rests without support, the weight of the arm may increase pulling through the shoulder and neck.
Ask your care team whether you may use a pillow, folded towel, armrest, or desk support under the forearm. This is especially relevant if your sling position changes when you sit at a desk.
For related home comfort, shoulder immobilizer vs sling explains why support style can change how protected the shoulder feels during daily tasks.
Mistake 3: Typing While Twisted Toward The Screen
Monitor position can quietly ruin an otherwise decent keyboard setup. If your screen sits off to the side, your torso rotates. When the torso rotates, the shoulder may follow. When the shoulder follows, the sling gets dragged into the argument.
Face the screen directly. Keep the keyboard and mouse in the same working zone. If you use multiple monitors, keep the most-used screen centered during recovery.
Mistake 4: Using A Laptop Flat On The Table All Day
A flat laptop combines a low screen with a fixed keyboard. That pulls the head forward, rounds the shoulders, and cramps the arms close to the table. It can be especially unfriendly after shoulder immobilization.
If you must use a laptop, consider raising the screen and using an external keyboard and mouse placed closer to your body. For neck and shoulder strain from screens, neck pain from laptop work gives a useful companion framework.
Short Story: The Spreadsheet That Lost The Argument
Marina thought she was being sensible. Three weeks after shoulder surgery, she opened a spreadsheet “just to update a few rows.” Her laptop sat flat on the kitchen table. The mouse lived to the right of the number pad. Her sling was technically on, but her forearm had no support. Fifteen minutes later, her neck felt tight.
Forty minutes later, her shoulder felt pulled forward. That evening, the ache arrived with the confidence of a landlord. The next morning, she changed only three things: compact keyboard, mouse near the midline, folded towel under the forearm as her therapist allowed. She also dictated the boring notes instead of typing every cell comment. The work took longer, but the pain did not bloom afterward. The lesson was not glamorous. Recovery rarely is. The setup did not need to look normal. It needed to stop asking her shoulder to negotiate with a spreadsheet.
One-Handed Typing: When Less Is Actually Smarter
Use Shortcuts Before You Use Grit
One-handed typing is slower. It can also be safer when the injured shoulder must stay protected.
Before you try to muscle through a normal typing pace, reduce keystrokes. Use keyboard shortcuts, text expansion, email templates, saved replies, browser bookmarks, autocomplete, and pinned documents. If your work uses the same phrases repeatedly, make snippets.
Examples:
- Create email templates for scheduling, follow-ups, and status updates.
- Use text expansion for your address, phone number, signature, and repeated phrases.
- Pin common browser tabs so you are not typing URLs all day.
- Use shortcuts for save, copy, paste, search, tab switching, and undo.
Voice Input Can Carry The Boring Stuff
Dictation is not perfect. It occasionally turns “follow-up appointment” into something that sounds like a pirate invoice. Still, it can reduce typing volume for emails, notes, drafts, search queries, calendar entries, and repetitive admin work.
Most phones and computers now include built-in voice input. Use it for rough text, then edit lightly. The first draft can be spoken. The final polish can be typed in short, supported bursts.
Let’s Be Honest…
One-handed typing can feel ridiculous. It may be slow. It may make you appreciate the humble Shift key in a new and dramatic way.
But slower can be smarter than asking the injured shoulder to help before it is ready. Your job is not to win a typing contest. Your job is to complete the necessary task without creating a symptom flare that steals the rest of the day.
- Use templates for repeated messages.
- Dictate rough drafts before editing.
- Batch small tasks into short sessions with breaks.
Apply in 60 seconds: Create one saved reply for the message you type most often.
Chair, Armrest, And Pillow Setup: The Support Triangle
Chair Height Sets The Shoulder Tone
Your chair controls the relationship between your elbows, wrists, keyboard, and shoulders. If the chair is too low, the keyboard may feel too high and cause shrugging. If the chair is too high without foot support, you may perch, lean, or lose stability.
Raise or lower the chair until the keyboard can be used with relaxed shoulders and supported forearms. If your feet no longer rest comfortably, use a stable footrest. A stack of books can work in a pinch, though your living room may briefly look like a graduate seminar with lumbar support.
Armrests Can Help Or Sabotage You
Armrests help when they support the forearm without lifting the shoulder, flaring the elbow, or bending the wrist awkwardly. They sabotage you when they are too high, too wide, too low, or too hard.
During recovery, the injured arm may need support from a pillow, sling, desk edge, or armrest depending on your restrictions. The key is to avoid pressure or position changes your clinician has not allowed.
If you are also trying to manage sleep and seated comfort, a wedge pillow after surgery may be relevant for non-desk recovery positioning, especially when lying flat is uncomfortable.
A Small Pillow Can Be A Recovery Tool
A pillow or folded towel can support the forearm if your clinician says this is allowed. It should not force the shoulder upward, push the arm away from the body, or create pressure near a sensitive incision.
Place support under the forearm rather than using the injured arm to prop your body. There is a difference between resting the arm and leaning through it. That difference matters.
Money Block: Support Tier Map
- Tier 1: Chair height adjusted so shoulders stay relaxed.
- Tier 2: Keyboard and mouse pulled close to reduce reach.
- Tier 3: Forearm supported as medically allowed.
- Tier 4: Compact keyboard or trackball added if reach remains high.
- Tier 5: Occupational therapist or workplace ergonomics review for longer workdays.
Neutral action line: Start with positioning changes before buying equipment, unless your clinician recommends a specific device.
Laptop Setup After Shoulder Immobilization: Fix The Tiny Desk Trap
Separate Keyboard, Better Screen Height
A laptop is convenient because everything is attached. That is also the problem.
If the screen is high enough, the keyboard is usually too high. If the keyboard is close enough, the screen is usually too low. After shoulder immobilization, this fixed relationship can encourage forward head posture, rounded shoulders, and unsupported arms.
A better setup often uses a raised laptop screen with a separate keyboard and mouse. The screen comes up. The keyboard comes closer. The mouse moves inside the comfort zone.
For a broader comparison of screen elevation options, laptop stand vs external monitor can help you choose without turning your desk into a gadget museum.
Avoid The Couch-Computer Spiral
The couch feels kind. The couch lies.
Soft seating often tilts the pelvis backward, rounds the upper back, drops the screen, and leaves the elbows unsupported. Add a sling, and the injured shoulder may hang or roll forward. Ten minutes can feel fine. Forty minutes can become a neck-and-shoulder invoice.
If you must work from a couch, use short sessions, a stable lap desk, foot support, and forearm support as allowed. Keep the screen higher if possible. Do not let comfort furniture quietly rewrite your recovery plan.
Micro-Setup For Small Apartments
You do not need a full home office. You need a small protected work zone.
Try this:
- Place the laptop on a stand, stack, or stable riser.
- Use a compact external keyboard close to your body.
- Keep the mouse or trackpad beside the keyboard.
- Support the forearm with a folded towel or pillow only if allowed.
- Work in short sessions with symptom checks.
If your shoulder recovery overlaps with bathing, cooking, or household setup challenges, guides like bathroom setup after shoulder surgery and one-handed meal prep may help you reduce strain beyond the desk.
Pain Signals: When Your Desk Is Telling On You
Soreness Is Data, Not A Moral Failure
Pain after typing does not mean you failed recovery. It means your body gave you information.
Notice symptoms during typing and later that day. Watch for neck tightness, hand fatigue, tingling, swelling, increased shoulder ache, elbow discomfort, or wrist irritation. Delayed symptoms are especially useful because they reveal when a session looked fine in the moment but cost too much afterward.
A functional pain assessment can help you describe what pain changes in daily life, not just what number it gets on a 0-to-10 scale.
Stop If Symptoms Change Suddenly
Do not solve red flags with a keyboard tray.
Stop and contact a clinician promptly if you notice new numbness, worsening pain, hand discoloration, major swelling, wound drainage, fever, spreading redness, sudden severe pain, chest pain, or shortness of breath. These are not “adjust the chair” problems.
Track What Happens After 20 Minutes
Use a simple recovery log for a few days. It does not need to be fancy. A notes app is enough.
- Setup used: chair, keyboard, mouse, laptop, support.
- Duration: how long you typed.
- Symptoms during typing.
- Symptoms two to four hours later.
- What reduced strain.
This gives your clinician better information and helps you avoid repeating the same setup mistake with fresh optimism.
- Track duration, setup, and delayed symptoms.
- Notice tingling, swelling, and new weakness quickly.
- Bring the log to your surgeon, PT, or OT if typing remains difficult.
Apply in 60 seconds: Start a note called “Typing Recovery Log” and record your next session length.
When To Seek Help Before Changing Your Workstation
Ask Your Surgeon About Restrictions First
Before changing how you type, confirm the rules that matter most: sling wear schedule, whether the arm may rest on a desk, lifting restrictions, range-of-motion limits, driving limits, wound precautions, and whether the hand and wrist may be used for light tasks.
Ask practical questions:
- May my injured forearm rest on a pillow while I type?
- May I use the injured hand for light keyboard contact?
- Should I avoid reaching forward completely?
- How long can I sit at a desk before taking a break?
- What symptoms mean I should stop immediately?
If you are unsure how to present these questions clearly, use an orthopedic visit checklist so the appointment does not disappear into the usual paper-gown fog.
Ask An Occupational Therapist For Work-Specific Setup
An occupational therapist can help translate medical restrictions into real work tasks. That might include one-handed workflows, adaptive devices, keyboard and mouse placement, voice input, pacing, and safer ways to handle forms, calls, and documents.
This is especially useful if you need to return to work before you feel fully comfortable. A generic desk tip may not solve a job that requires charting, customer support, design software, coding, or high-volume data entry.
Call Promptly For Red-Flag Symptoms
Call promptly for chest pain, shortness of breath, sudden severe pain, fever, spreading redness, wound drainage, new numbness, hand discoloration, or major swelling. Follow your discharge paperwork for emergency instructions.
The 10-Minute Keyboard Reset: A Practical Next Step
Step 1: Move The Keyboard Closer
Sit in your chair with your sling or immobilizer positioned as instructed. Relax your shoulders. Bring the keyboard closer until your elbows can stay near your body.
If the keyboard cannot come close because the desk edge, laptop, or clutter blocks it, remove the obstacle. Recovery desks are not decorative altars to old receipts, spare cables, and cold coffee.
Step 2: Bring The Mouse Into The Same Zone
Move the mouse beside the keyboard, not far beyond it. If your full-size keyboard pushes the mouse too wide, test a compact keyboard, separate number pad, trackball, touchpad, or shortcuts.
Do not change five things at once if you can avoid it. One change at a time makes the result easier to understand.
Step 3: Support, Test, Adjust
Support the forearm as allowed. Type for five minutes. Then stop and scan your body.
- Shoulders still relaxed?
- Neck still comfortable?
- Wrist still neutral?
- Injured arm still supported?
- No new pulling, tingling, swelling, or pain increase?
If the test goes well, continue in short blocks. If symptoms increase, shorten the session, move the keyboard or mouse closer, adjust chair height, use dictation, or contact your clinician for task-specific guidance.
Money Block: Mini Typing Session Calculator
Use this simple planner to cap desk time during early recovery. It does not store data.
Neutral action line: Keep blocks short enough that symptoms do not climb during or after the session.
- Move the keyboard closer before buying anything.
- Move the mouse closer before blaming the chair.
- Use five-minute tests to catch strain early.
Apply in 60 seconds: Pull your keyboard two inches closer and do the 30-second shoulder-shrug test.

FAQ
Where should I place my keyboard while wearing a shoulder sling?
Place the keyboard close to your body, centered or slightly shifted toward your comfortable typing side, with shoulders relaxed and elbows supported as allowed. The injured shoulder should not need to reach forward, lift, twist, or hover. Your surgeon’s or therapist’s instructions come first.
Is it safe to type after shoulder immobilization?
It depends on your injury, surgery, restrictions, pain level, and whether typing forces shoulder movement. Light typing may be allowed for some people, while others need stricter limits. Ask your clinician what hand, wrist, elbow, and shoulder activity is allowed during your current phase.
Should my injured arm rest on the desk while typing?
Only if your clinician says it is allowed and it does not increase pain, pulling, swelling, or shoulder movement. Many people need forearm support rather than pressure through the shoulder. A pillow or folded towel may help, but it should not change your sling position or violate restrictions.
Is a compact keyboard better after shoulder surgery?
Often, yes. A compact or tenkeyless keyboard can reduce reach, especially to the mouse, and may make the setup easier to keep close and centered. It is most helpful when a full-size keyboard pushes the mouse too far away.
Can I use a laptop after shoulder immobilization?
Yes, if your medical restrictions allow computer use, but a flat laptop setup can encourage poor posture. A raised laptop screen plus separate keyboard and mouse is often easier on the neck, shoulder, and wrists because the screen can rise while the keyboard stays close.
What keyboard height is best after shoulder immobilization?
A comfortable height usually lets the shoulders relax, elbows stay near the body, forearms receive support as allowed, and wrists remain neutral. Avoid setups that make you shrug, lean, twist, or reach forward.
What should I do if typing makes my shoulder hurt?
Stop, reduce typing time, adjust the keyboard and mouse closer, support the arm as permitted, and track what changed. Contact your clinician if pain worsens, changes suddenly, or comes with numbness, swelling, weakness, fever, wound drainage, or hand color changes.
Can voice dictation replace typing during recovery?
For many tasks, yes. Dictation can reduce keystrokes for emails, notes, drafts, messages, and search queries. It may still need editing afterward, but it can carry the boring bulk work while your shoulder stays out of the negotiation.
Should I buy a special keyboard tray?
Maybe, but start with distance, height, and support first. A tray can help if it brings the keyboard and mouse closer while keeping wrists neutral. It can hurt if it is too low, too narrow, unstable, or forces the injured arm into an awkward position.
How long should I type at one time after shoulder immobilization?
Follow your clinician’s guidance. If you are cleared for light typing, start with short blocks such as five to ten minutes, then check symptoms during and later. Longer sessions should be earned gradually, not forced because the inbox looks dramatic.
Conclusion: Make The Desk Serve The Shoulder
The small desk friction from the beginning of this guide has a simple lesson: after shoulder immobilization, the keyboard should stop acting like a destination. It should come to you.
A safer setup usually means a close keyboard, nearby mouse, supported forearm, neutral wrist, relaxed shoulders, and shorter typing blocks. It may mean using a compact keyboard, dictation, templates, shortcuts, a raised laptop, or an occupational therapist’s help. It almost always means respecting the medical plan before chasing productivity.
Your concrete next step: spend 15 minutes today doing the 10-minute keyboard reset, then type for five minutes and record what your shoulder, neck, wrist, and hand feel like afterward.
The goal is not to make your desk look impressive. The goal is to make it quiet. Quiet is underrated. In recovery, quiet can be golden.
Last reviewed: 2026-05.